
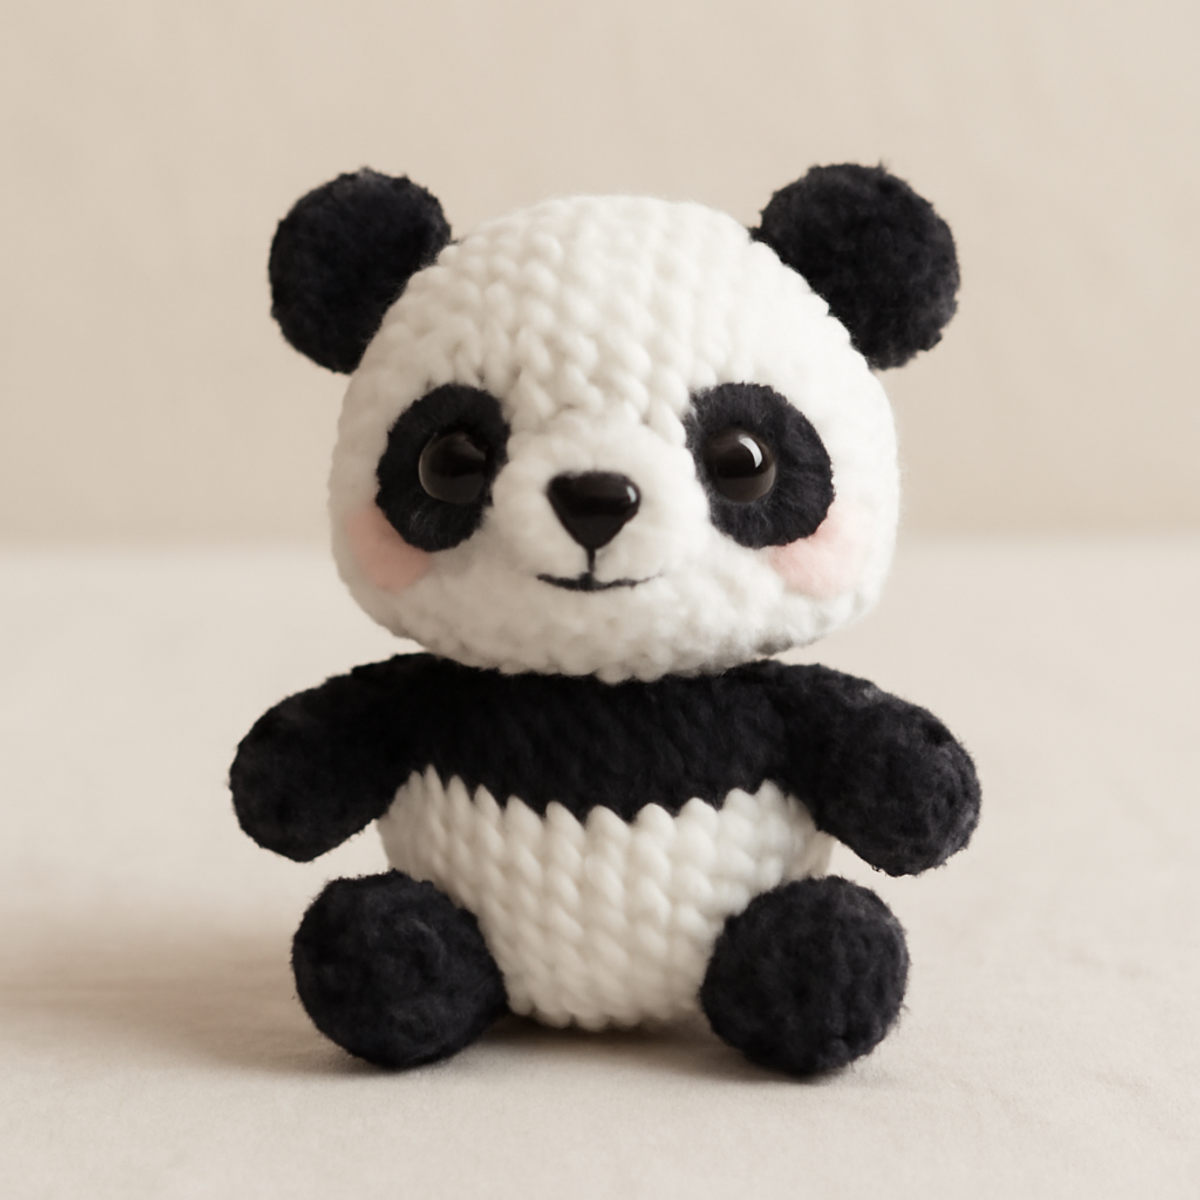
As I sat on my couch, a soft skein of plush chenille yarn draped across my lap, I felt a spark of inspiration—the kind that happens when you know a delightful project is waiting to take shape. Today, I'm excited to share my latest crochet adventure: the amigurumi panda pattern. This Cute Little Panda Amigurumi is not only a joy to create but also a fantastic way to enhance your skills while crafting something utterly adorable. Its compact size and huggable design make it perfect for gifting or adding a touch of charm to any space. Plus, it's an excellent stash-buster that promises quick satisfaction as you watch this sweet little bear come to life. Are you ready to dive into some cozy stitches and bring your very own panda to snuggle? Let's get started!
Amigurumi Panda Pattern Materials & Tools
-
Yarn
- Plush Chenille Yarn – You'll need approximately 150-200 yards of white yarn for the main body, with small amounts of black and pink for accents.
-
Hook
- 4.0-4.5 mm (G-6 to H-8) Hook – This size is perfect for working with plush yarn for a cuddly feel in your amigurumi panda.
-
Notions
- 12 mm Black Safety Eyes – These add the sweetest expression to your panda.
- Black Yarn for Embroidery – Use this to create facial features and accents for your panda.
- Polyester Stuffing – Ensure your panda is plush and huggable with a nice amount of stuffing.
- Yarn Needle – Ideal for sewing all the components together neatly.
- Scissors – Keep your trusty pair on hand for snipping yarn as needed.
Dive into this enchanting amigurumi panda pattern and watch your adorable creation come to life!
Why Choose This Amigurumi Panda?
Joyful Creation: The amigurumi panda pattern delivers instant happiness as you crochet a plush friend that’s perfect for all ages.
Soft Texture: Crafted from cozy chenille yarn, this delightful panda is soft to the touch, inviting endless cuddles.
Simple Assembly: With straightforward construction of separate components, you’ll find this project approachable and satisfying—even for intermediate crafters.
Versatile Design: Personalize your panda by swapping colors or adding fun accessories like a scarf or hat, making each piece uniquely yours.
Quick Satisfaction: Enjoy the instant gratification of creating a compact, huggable plush, perfect for gifting or brightening up your décor.
Gauge & Sizing Notes
Don't skip the gauge swatch! For the amigurumi panda pattern, ensuring your tension is just right is essential for achieving a cuddly and precisely shaped panda. A general guideline to follow is working a tension swatch to achieve a good consistency in your stitches, aiming for around 6 single crochet stitches per inch. To make your panda larger or smaller, adjust your starting magic ring or chain in multiples of 6 depending on how you want to size up or down. If your swatch is too small, don’t worry—simply move up a hook size for a softer tension. Happy crocheting!
Step-by-Step Pattern for Cute Little Panda Amigurumi
Row 1: Start the Head
Begin by creating a magic ring. Work 6 single crochet (sc) into the ring, pulling tight to close. This will form the base of the panda's head. Your work should create a small circle. Place a stitch marker to track your first stitch (6 sts).
Row 2: Increase for Shape
In the second round, work 2 sc in each stitch around. You’ll be increasing to create a rounded shape for the panda's head. As you crochet, it should start to look fuller and more 3-dimensional (12 sts).
Row 3: Continue Shaping the Head
For this round, crochet 1 sc in the first stitch, then 2 sc in the next stitch. Repeat this pattern around. You should be forming the chin and head shape, maintaining a rounded look (18 sts).
Row 4: Add More Height
In this round, work 1 sc in each stitch around, no increases. This will help establish the panda's head height. You’ll notice your work becoming taller and more defined (18 sts).
Row 5: Eyes and Features
Now it's time to add the safety eyes. With your yarn needle, mark where you want to place the eyes approximately 5 stitches apart, and insert the 12 mm black safety eyes. Continue to crochet, adding small details with black yarn for the nose and mouth.
Row 6: Finish the Head
Continue with 1 sc in the first stitch, followed by 1 dec (decrease) in the next. Repeat this pattern, which will gently reduce the head size and round it off beautifully (12 sts).
Step 1: Body Construction
To create the body of your adorable amigurumi panda, start with a magic ring and crochet 6 sc into the ring, just like the head. Keep those stitches close to form a stable bottom (6 sts). This forms the base for your plush panda.
Step 2: Increase for the Body
In the next round, work 2 sc in each stitch around. This helps create a fuller body shape for the panda, so it has a nice plump form. You should see the bottom expanding (12 sts).
Step 3: Build Up
Continue to increase by crocheting 1 sc in the first stitch followed by 2 sc in the next stitch around. Your piece will become more rounded and establish a comfy shape (18 sts).
Step 4: Reaching the Height
Work 1 sc in each stitch for the next several rounds. This will help build the height of the panda’s body. With each round, you’ll see your panda taking form, ready for cuddles ahead (18 sts).
Step 5: Closing the Body
Once you reach a height of about 4 inches, begin decreasing to close the body. Work 1 sc in the first stitch, then a dec in the next stitch, repeating this pattern to create a rounded closure (12 sts).
Step 6: Completing the Body
For the final rounds, do 1 sc in each stitch around to finish off the body. Stuff the body firmly with polyester stuffing for a cuddly feel (12 sts).
Step 1: Crochet Arms
To create the arms, start with a magic ring and work 6 sc into the ring. This will be the base of your panda's arms, so keep the stitches securely tight (6 sts).
Step 2: Shape the Arms
In the next round, increase by working 2 sc in each stitch around. This will create the rounded shape of the arms, making them perfect for hugging (12 sts).
Step 3: Finish Off Arms
Continue for 2 more rounds with 1 sc in each stitch to establish the length of the arms. Your work should feel chunky and cute, perfectly shaped for your panda (12 sts).
Step 1: Create Legs
Following the same method for the arms, start the legs with a magic ring and work 6 sc into the ring to establish the leg base (6 sts).
Step 2: Shape the Legs
Increase in the next round by 2 sc in each stitch to round out the legs. This softness will complement the panda’s overall cuddly appearance (12 sts).
Step 3: Lengthen the Legs
Continue crocheting 1 sc in each stitch around for 2 more rounds to achieve leg length. Your legs should feel plump and define while maintaining that adorable style (12 sts).
Step 1: Crafting the Ears
For the ears, begin with a magic ring and crochet 6 sc into the ring. This will give a round base for the panda's ears, perfecting the look (6 sts).
Step 2: Ears Shape
In the next round, increase to 12 sc by working 2 sc in each stitch. Your ears should be quite round and ready to attach to the head (12 sts).
Step 3: Attach Ears
Now, you can fasten off and leave a long tail for sewing. Securely sew the ears onto the top corners of the panda’s head. These little features add so much charm to your amigurumi panda!
Step 1: Assembly
It’s time for assembly! Start by firmly stuffing the head with polyester stuffing, making it cozy. Then, sew the head onto the top of the body, taking care to align it securely but gently (1 attachment).
Step 2: Attach Arms
Next, sew the arms on either side of the body at a comfortable height for hugging. This adds to the panda's endearing look (2 attachments).
Step 3: Attach Legs
Lastly, sew the legs at the base of the panda’s body, making sure they sit nicely and comfortably. They should be dimpled, adding to the cuddly stance of your amigurumi panda (2 attachments).
Step 4: Finishing Touches
Finally, weave in any loose ends, and you may want to lightly steam-block your panda to smooth out any uneven stitches. Now, your Cute Little Panda Amigurumi is complete and ready to be loved!
Expert Tips for Amigurumi Panda
-
Consistent Tension: Maintain even tension to avoid gaps between stitches. This not only enhances the overall look but ensures your amigurumi panda is cuddly.
-
Count Your Stitches: Keep a close eye on your stitch count, especially during color changes. Losing track can lead to mismatched shapes or unexpected holes.
-
Use a Stitch Marker: Place a stitch marker at the beginning of each round to help you keep track without confusion, avoiding common counting mistakes.
-
Finish Neatly: Weave in all loose ends to create a polished final look. A tidy finish helps your cute panda maintain its charm and durability.
-
Light Blocking: Gently steam-block after assembly to even out any uneven stitches but be cautious—direct heat can damage the plush yarn.
Embarking on this amigurumi panda pattern will bring so much joy to your crafting journey!
Care Instructions for Amigurumi Panda
-
Washing: Always wash your amigurumi panda by hand in cold water with a mild detergent to maintain its soft texture and shape. Avoid machine washing, as agitation can lead to felting.
-
Drying/Blocking: Lay your panda flat on a clean towel to dry, reshaping as necessary. This will help preserve its adorable form while preventing any damage from twisting or tumbling.
-
Storage: When not in use, store your panda in a cool, dry place away from direct sunlight to prevent fading. Keeping it in a breathable bag or container can protect it from dust.
-
Gentle Care: For minor stains, spot clean with a damp cloth. This way, your amigurumi panda remains a cherished companion for years to come!
Amigurumi Panda Pattern Variations
Feel free to explore these fun ideas, transforming your amigurumi project into something uniquely yours!
-
Color Changes: Switch the main color to gray or brown for a different bear type. A light shade offers a charming twist that can redefine your panda's personality.
-
Accessory Additions: Add personal touches like a scarf or hat in contrasting colors. These little embellishments will bring even more character to your beloved panda!
-
Eye Options: Experiment with larger or smaller safety eyes for different expressions. This simple tweak can make your panda appear playful or sleepy, depending on your choice.
-
Custom Stuffing: Customize the stuffing density for varied firmness. A firmer fill gives a sturdy feel, while a softer touch offers extra cuddles—it’s up to you!
-
Texture Enhancements: Introduce fun textures by adding a border or pom-poms around the panda’s feet. Playing with texture brings new life and fun to your creation.
-
Size Adjustments: Consider adjusting your yarn weight to create a larger or smaller panda. Switching to bulky yarn can yield a huggable giant, while lighter yarn produces an adorable mini.
-
Color-Blocking Fun: Try color-blocking by incorporating different colors for the arms and legs. This eye-catching detail will make your amigurumi panda stand out in any collection.
-
Facial Expression Variations: Use different yarns or stitches to create unique facial expressions or add eyebrows for some personality. Your crafting adventure will shine through with these charming features!
What to Pair with Cute Little Panda Amigurumi
Crafting can be an enchanting journey, especially when you create a delightful match for your new plush pal.
-
Fluffy Mini Scarf: Wrap your panda in a warm scarf using the same plush chenille yarn for a whimsical touch. Just imagine how cozy it will look snuggled up!
-
Charming Mini Beanie: Add a mini beanie to your panda's head, showcasing the yarn's softness while giving it a stylish flair.
-
Adorable Accessories: Consider crafting a small bamboo or heart charm; these tiny details add an enchanting layer and celebrate the panda theme beautifully.
-
Cuddly Matching Blanket: Create a small, plush blanket to accompany your panda, perfect for snuggling during storytime or playtime adventures.
-
Cute Animal Friends: Bring a companion into the mix by crocheting a tiny amigurumi bunny or bear; they'll love having pals to play with!
Cute Little Panda Amigurumi FAQs
Can I substitute the plush chenille yarn for another type?
Absolutely! While the plush chenille yarn gives a delightful texture, you can substitute it with worsted-weight acrylic or cotton yarn for a different feel. Just remember to check your gauge to maintain the panda's size.
How can I make my amigurumi panda bigger or smaller?
To adjust the size, you can use a thicker yarn and an appropriately larger hook for a bigger panda, or a thinner yarn and smaller hook for a more petite version. Just keep in mind that changes in yarn weight may affect your stitch count slightly, so be sure to gauge as needed.
Why is my work curling at the edges?
Don’t panic! Curling often happens due to uneven tension or using the wrong hook size. I recommend checking your tension and trying a bigger hook size. This should help your stitches lay flatter as you continue.
What size hook should I use for this panda amigurumi pattern?
For the Cute Little Panda Amigurumi, a 4.0-4.5 mm (G-6 to H-8) hook is ideal. Using this hook size with plush chenille yarn will create that cuddly texture you're aiming for!
How do I fix a dropped stitch in my amigurumi?
It's an easy fix! Simply locate the dropped stitch, pull the yarn back to create a loop, and use your hook to draw it back up to the working row. Don't worry if you need to frog a few stitches; just remember to keep an eye on your counts as you continue stitching.
Can I add details like a scarf or different eyes to my panda?
Yes! Personalizing your amigurumi panda is part of the joy. Feel free to add a cozy scarf or experiment with larger or smaller safety eyes to give your panda a unique expression. The possibilities are endless, and it’s a wonderful way to make your project special!
Leave a Reply