
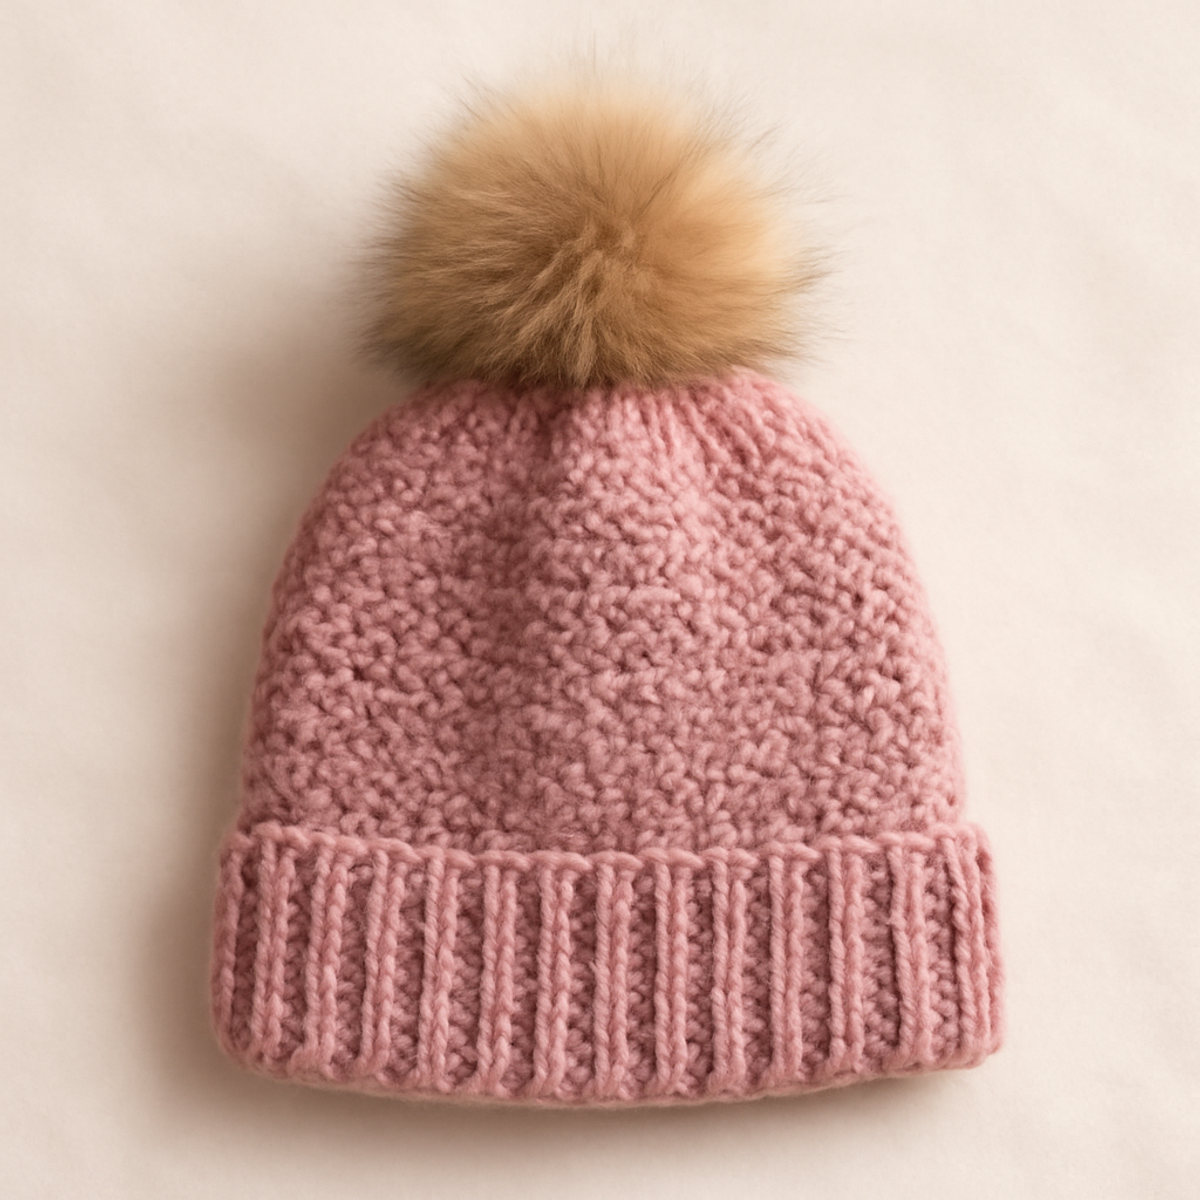
As the autumn breeze starts to nip at our noses, I find myself searching for the perfect cozy accessory to ward off the chill. Enter the Classic Ribbed Crochet Beanie—my go-to cold-weather staple that not only keeps my head warm but also adds a touch of flair to any outfit. This crochet beanie is designed with both beginners and seasoned crafters in mind, making it an accessible project for anyone ready to create something truly special. With its gentle ribbed texture, this timeless piece is ideal for customizing with your favorite colors and embellishments. Whether you’re looking for a quick weekend project or a stylish addition to your wardrobe, you’ll love how fast and satisfying it is to make. Ready to dive into this delightful project? Let’s get those hooks moving and create something beautiful together!
Crochet Beanie Materials & Tools
- Medium-Weight Yarn (Category 4) – You'll need about 150-200 yards for a cozy crochet beanie that fits an average adult size.
- 5.0 mm (H/8) Hook – This size is ideal for creating the ribbed texture and comfortable structure of your beanie.
- Yarn Needle – Essential for weaving in those pesky loose ends and giving your beanie a polished finish.
- Scissors – A necessary tool for snipping yarn and keeping your project tidy.
- Pom-Pom Maker (optional) – Use this handy tool for crafting a fluffy topping to add a touch of charm to your finished beanie.
Why Choose This Crochet Beanie?
Beginner-Friendly: This crochet beanie is perfect for crafters of all skill levels, offering a straightforward pattern that encourages creativity without overwhelming complexity.
Stylish Texture: The ribbed design not only enhances the visual appeal but also adds warmth, making it a practical choice for chilly days.
Quick Project: Great for a weekend craft session, this beanie can be completed in no time, providing instant gratification for those seeking a fast, rewarding project.
Personalization Options: With endless color combinations and embellishments, you can easily customize each beanie to match your unique style and preference.
Versatile Accessory: This cozy beanie transitions beautifully between seasons, ensuring you can enjoy it throughout the colder months or even spring.
Gauge & Sizing Notes
Don't skip the gauge swatch! Checking your tension is essential for ensuring your crochet beanie fits perfectly. A typical guideline for a crochet beanie is to aim for a tension swatch of approximately 4×4 inches (10×10 cm) resulting in 12 double crochets by 10 rows. If your gauge doesn't match, don't worry! If your swatch is too small, try going up a hook size; conversely, if it's too large, consider decreasing your hook size. To adjust the size of your beanie, make your starting chain in multiples of 6, ensuring a cozy fit or adapting it for different head sizes. Happy crocheting!
Step-by-Step Pattern for Crochet Beanie
Row 1: Start the Crown
Begin by making a magic ring, then ch 2 (this does not count as a stitch). Work 12 dc into the ring. Pull the tail to close the magic ring. At the end of this row, you should have 12 dc stitches, and your work will appear as a small circle.
Row 2: Increase for the Crown
Ch 2, then make 2 dc in each stitch around (24 sts total). This will create an increase for the beanie's crown area. Your work should start to cup slightly at this point, resembling a shallow bowl.
Row 3: Continue Increasing
Ch 2 and then dc in the first stitch, 2 dc in the next stitch; repeat from * around (36 sts total). Your work will continue to form a dome shape, gradually expanding to fit the head.
Row 4: More Increases
Ch 2, then dc in the first 2 stitches, 2 dc in the next stitch; repeat from * around (48 sts total). Keep your tension consistent to ensure a smooth dome shape, and your work should look nice and rounded.
Row 5-10: Build the Body
Ch 2, and work 1 dc in each stitch around for 6 rows (48 sts). With each row, your crochet beanie will start to take more shape, transitioning from the crown to the body of the hat. Let the stitch counts remain steady at 48 as you work.
Row 11: Switch to the Brim
Ch 1, and switch to sc stitches for the brim. Work one sc in each stitch around for 2 rows (48 sts). This will help create a snug fit around your head. Your work should feel more compact as you complete this section.
Row 12-13: Finalize the Brim
Ch 1, continue with sc in each stitch around for 2 more rows (48 sts). This will ensure a cozy and comfortable fit for your crochet beanie. At this point, the brim should feel substantial and secure.
Step 14: Finish Off
After completing your beanie, tie off the yarn, leaving a long tail for weaving in. Use a yarn needle to weave in any loose ends for a polished finish. Your cozy crochet beanie is now ready to wear or give as a thoughtful gift!
Expert Tips for Your Crochet Beanie
-
Stay Tension Consistent: Maintaining even tension is vital to avoid variations in size. Uneven stitches can cause the beanie to fit oddly, so practice steady pressure as you crochet.
-
Count Regularly: Regular stitch counting, especially during increases, will help you ensure a symmetrical shape. Losing count can lead to unintended size adjustments, so check frequently!
-
Block for Polish: After finishing, lightly block your crochet beanie by dampening it and shaping it flat. This adds a polished look and helps the beanie's structure stand out beautifully.
-
Weave Ends Neatly: Tie off your yarn carefully and weave in any loose ends using a yarn needle. This finishing step prevents unraveling and keeps your project looking neat and finished.
-
Adjust for Fit: If you desire a snugger or looser fit, experiment with hook size or yarn tension. This small tweak can make significant differences in the fit of your crochet beanie.
Crochet Beanie Variations & Substitutions
Discover delightful ways to infuse your crochet beanie with a personal touch and creativity!
-
Yarn Alternatives: Swap medium-weight yarn for a lighter option like sport-weight cotton for a breathable summer version.
-
Color Blocking: Experiment with contrasting colors by using one hue for the main body and another for the brim, creating a bold statement.
-
Thicker Yarn: Opt for bulky yarn instead of medium-weight for added warmth and a cozier beanie, perfect for colder climates.
-
Texture Upgrades: Incorporate popcorn or cable stitches to elevate the design, offering visual interest and texture to your classic look.
-
Size Adjustments: Reduce the number of initial rounds for a toddler-sized beanie or increase them for a trendier oversized version.
-
Pom-Pom Addition: Craft a playful pom-pom topping to add whimsy, making your beanie even more fun to wear.
-
Fringed Edge: Add a fringe to the brim for an adventurous twist, giving your beanie a unique bohemian flair.
-
Embellishments: Personalize further with buttons or decorative stitches, transforming each beanie into a unique accessory that tells your story.
Care Instructions for Crochet Beanie
Machine Washing: Set your machine to a gentle cycle with cold water to prevent any wear or shrinkage. Always place your crochet beanie in a mesh bag for extra protection.
Hand Washing: For optimal care, gently wash your crochet beanie in cold water using a mild detergent. Avoid any agitation to keep the delicate stitches intact.
Drying/Blocking: Lay your beanie flat on a clean towel and reshape it to its original form. Avoid hanging, as this can distort its shape.
Storage: Store your crochet beanie in a cool, dry place to preserve its beauty. Consider using a breathable bag to protect it from dust while allowing airflow.
What to Pair with the Classic Ribbed Crochet Beanie
Ready to expand your crochet creations? Building a cozy set can elevate your crafting and style game this season!
-
Ribbed Crochet Scarf: A matching scarf in the same yarn adds warmth and complements the beanie beautifully. Perfect for chilly outings, this set radiates style.
-
Textured Mittens: Create mittens featuring the same ribbed texture for a cohesive look. Your hands will thank you for the extra warmth on frosty days!
-
Cozy Cowl: A simple cowl in coordinating colors completes your outfit while providing extra warmth. Loop it over your neck for a snug fit!
-
Chunky Fingerless Gloves: These gloves give freedom while keeping your hands warm, and they can share the same yarn palette as your crochet beanie.
-
Matching Pom-Pom Keychain: Add a fun little pom-pom to your keys or bag, echoing the beanie's fluff, and bringing a whimsical touch to your accessories.
Classic Ribbed Crochet Beanie FAQs
Can I substitute different yarn types for this crochet beanie?
Absolutely! While a medium-weight (Category 4) yarn is recommended for this crochet beanie, you can experiment with other fibers. Swapping acrylic for cotton can give your beanie a lighter feel, but keep in mind cotton has less stretch, so your fit may vary.
How do I adjust the size of my crochet beanie?
If you want a larger beanie, consider using a thicker yarn or adjusting your hook size to a 6.0 mm (J/10) or even larger. To make it smaller, you could reduce the number of rounds in the body or stick with a tighter tension throughout your project. Remember to measure as you go!
Why is my crochet beanie curling at the edges?
Don't panic! This is usually due to tight stitches or improper tension. Make sure to check your stitch counts and loosen up your tension. A quick steam block may also help flatten any stubborn edges.
What hook size should I use for this crochet beanie?
The recommended hook size is 5.0 mm (H/8) for a balanced fit and texture. If you're a loose crocheter, you might want to go down a size to ensure your beanie maintains its shape. Conversely, if you crochet tightly, try a 5.5 mm (I/9) hook for a bit more ease.
How do I fix dropped stitches in my crochet beanie?
It's an easy fix! Simply pick up the dropped stitch with your crochet hook and work it back into the surrounding stitches. If too many stitches have dropped, you might need to unravel your work a row or two to re-establish your stitch count. Remember, stitch counters can be a lifesaver for keeping track!
Leave a Reply