
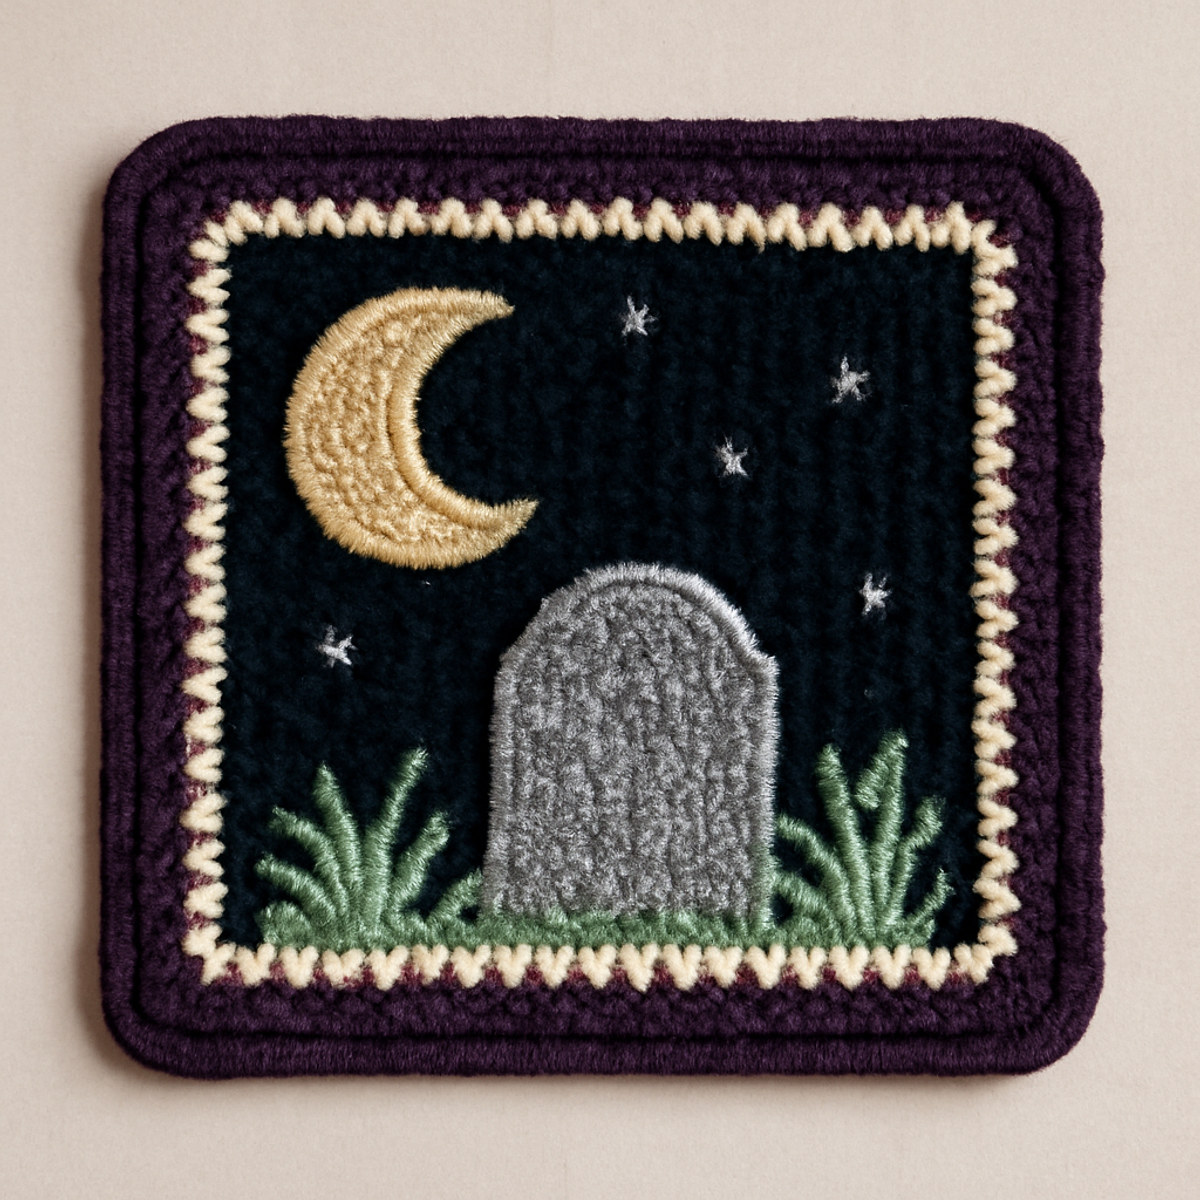
There’s a certain magic that envelops the air as autumn unfolds—a cozy chill punctuated by crunching leaves and the spirit of Halloween creeping in. For those of us who adore crochet, it’s the perfect time to embrace the whimsy of the season with this delightful crochet graveyard square. This charming pattern allows you to tap into your creativity, showcasing a playful, spooky theme that makes the ideal addition to your seasonal decor. Not only will you be able to refine your color-changing skills while crafting this unique piece, but you can also personalize it with hues that reflect your own spooky flair. So, gather your yarn and let’s get ready to create something that captures the enchanting essence of Halloween—your very own crochet graveyard square awaits!
Crochet Graveyard Square Materials & Tools
-
Yarn
- Medium Worsted Weight Yarn – Approximately 150-200 yards will be needed to complete the square, including the border.
- Acrylic Blend Yarn – This fiber type offers durability and ease of care, perfect for seasonal decor.
-
Tools & Notions
- 5.0 mm (H-8) Crochet Hook – This hook size is ideal for achieving the right stitch density for your crochet graveyard square.
- Yarn Needle – Essential for weaving in ends and ensuring a polished finish.
Why Choose This Crochet Graveyard Square?
Unique Theme: Embrace the whimsical graveyard design, perfect for Halloween enthusiasts looking to add charm to their decor.
Skill Enhancement: This project helps you master colorwork and stitch variations, appealing to intermediate crocheters wanting to level up their skills.
Personalization Options: Easily customize this square with different motifs and colors to match your aesthetic or mood.
Seasonal Appeal: Ideal as a seasonal accent, this piece brings a playful yet spooky vibe to your home during autumn.
Textural Richness: The combination of stitch types creates a lovely texture, allowing your finished piece to pop and grab attention.
Easy Care: Crafted from durable acrylic yarn, this square is not only beautiful but also easy to maintain and display year after year.
Gauge & Sizing Notes
Don't skip the gauge swatch! Checking your crochet gauge is essential for the successful completion of your Halloween graveyard square. Aim for a standard gauge of approximately 4×4 inches (10×10 cm) with about 15 double crochets by 10 rows. This will ensure that your square achieves the intended dimensions—about 10 inches by 10 inches when complete. If you wish to adjust the size of your square, simply increase your foundation chain by multiples of 5. If your swatch is too small, try using a larger hook size to achieve a looser tension. Enjoy the creative process as you make this crochet graveyard square uniquely yours!
Step-by-Step Pattern for Halloween Graveyard Crochet Square
Row 1: Foundation Chain
Begin by making a slip knot and create a foundation chain of 30 stitches, ensuring it’s neither too tight nor too loose. This will give you the base of your crochet graveyard square. Adjust your tension to avoid curling. Once completed, your chain should lay flat and be ready for the next row.
Row 2: First Row of Single Crochet
In the second chain from the hook, work a single crochet (sc) in each chain across. Continue this for a total of 29 sc, then turn your work. This row establishes a sturdy base, and your work should have a neat, even appearance, preparing for color changes.
Row 3: Begin the Black Background
Change to black yarn. Chain 1 and work 29 sc in black across the row. This will create a solid black background for the graveyard scene. Remember to keep your tension consistent so the stitches remain uniform. At the end, you should have a total of 29 black stitches.
Row 4: Creating the Tombstone
Switch to gray yarn. Chain 1, then work 10 hdc (half double crochet) in the first 10 stitches. Change back to black and work 19 sc in the remaining stitches. This row outlines the tombstone, gradually building the composition and enhancing the visual contrast of your crochet graveyard square.
Row 5: Adding Detail to the Tombstone
With gray yarn, chain 1 and hdc in the first 10 stitches, then switch to black for the remaining 19 sc. Repeat what was done in Row 4, but add a few additional stitches to enhance the tombstone shape. Your work should start to take form, providing depth.
Row 6: Moon and Stars
Using yellow or white yarn, chain 1 and work 5 dc (double crochet) in the first stitch to create a crescent moon shape. Skip 2 stitches and work 2 dc in the next stitch for stars. Continue alternating with sc in black for the remainder of the row. This adds a delightful nighttime charm to your crochet graveyard square.
Row 7: Grass Texture
Switch to green yarn and chain 1. Work 5 hdc in the first 5 stitches to create grassy patches, then transition to 24 sc around the tombstone. End with another 5 hdc, creating a beautiful textured bottom. Your grass should look fluffy and vibrant, enhancing the overall scene of the square.
Row 8: Completing the Square Body
With your green yarn still, chain 1 and work across with 29 sc to close the body of the square. This final row solidifies your base, and your work should beautifully frame the graveyard scene, showcasing all the elements you've crafted.
Step 9: Edging the Square
Change to cream yarn. Chain 1 and sc evenly around the entire square to create a neat border. Work 3 sc in each corner to allow the square to maintain its shape, ensuring that all stitches are tight yet not so tight that they distort the shape. This border helps finish off your crochet graveyard square.
Step 10: Final Border Round
Now switch to purple yarn. Chain 3—this counts as your first dc—and work a dc in each sc around, ensuring to place 3 dc in each corner space. This playful color adds depth to the outer edge of your Halloween graveyard crochet square. Your square should now feel complete and sturdy.
Step 11: Weaving in Ends
Finally, use a yarn needle to weave in any loose ends from your color changes, ensuring a polished finish. Your crochet graveyard square should now display a whimsical charm, ready to be admired or gifted as a fantastic seasonal decoration!
Expert Tips for Crochet Graveyard Square
-
Tension Consistency: Maintain even tension to ensure that the varying stitch heights blend beautifully; inconsistent tension may lead to a wavy or uneven square.
-
Stitch Counting: Be diligent in counting stitches, particularly during color changes, to avoid gaps in your crochet graveyard square and ensure a neat, cohesive look.
-
Color Management: While changing colors, be mindful of where you introduce each new yarn to create smooth transitions—this keeps the design clean and visually appealing.
-
Final Touches: After finishing, block your square to bring out the shape and stitch definition, allowing any unique textures to truly pop in the final piece.
-
Weaving Ends: Take your time to weave in yarn ends securely, as this will help the square hold its shape and maintain its aesthetic integrity over time.
Variations & Substitutions for Crochet Graveyard Square
Embrace the joy of crafting by adding your own personal touch to this delightful crochet square!
-
Yarn Weight: Opt for a lighter weight, like sport or DK, to create a more delicate version of your square. This will result in a beautifully airy feel that is perfect for subtle decor.
-
Fiber Alternatives: Swap the acrylic blend for cotton yarn for a soft, breathable texture. This option suits warmer indoor spaces, adding an inviting charm year-round.
-
Color Blocking: Introduce an additional color for the tombstone or background. Consider a vibrant orange or deep purple to highlight the playful nature of Halloween, adding a bold twist to the design.
-
Size Adjustments: For a cozy throw or larger wall hanging, increase the foundation chain and number of rounds. Just three extra rounds can transform your piece into a standout centerpiece.
-
Texture Modifications: Try adding dimensional elements by incorporating bobbles or popcorn stitches in the grass area. They will create delightful depth and an engaging tactile experience.
-
Motif Additions: Personalize your square by stitching little ghosts, bats, or even a friendly pumpkin alongside the graveyard theme. Each added motif tells a unique story.
-
Fringed Edges: Use contrasting yarn to create fringes along the borders for a playful finish. This whimsical touch adds movement and charm to your already enchanting square.
-
Embellishments: Consider adding securely stitched on embellishments like sequins or beads to the moon or stars. This will catch the light and enhance the magical aura of your crochet creation.
What to Pair with Halloween Graveyard Crochet Square?
Embrace the enchanting spirit of the season as you explore delightful project pairings that complement your crochet creations beautifully.
- Spooky Crochet Coasters: These quick and fun coasters can feature pumpkin or ghost motifs, perfect for your Halloween gatherings.
- Knitted Pumpkin Pile: Create a charming display with fluffy pumpkins that add a burst of color alongside your graveyard square.
- Whimsical Wall Hanging: Craft a matching wall piece that showcases the graveyard theme, inviting an eerie elegance to your autumn decor.
- Charming Bats Garland: A festive garland of crocheted bats will flutter alongside your square, creating a playful ambiance for the season.
- Ghostly Mini Pillow: Crochet a small pillow shaped like a friendly ghost, providing a cozy touch to your decor while echoing the graveyard theme.
How to Wash and Care for Your Crochet Graveyard Square
Machine Washing: Use cold water on a gentle cycle, and place your crochet graveyard square in a mesh laundry bag to protect it from snagging.
Hand Washing: If preferred, gently hand wash in cold water with mild soap, taking care not to twist or rub too harshly to prevent stretching or distortion.
Drying/Blocking: Lay your piece flat on a clean towel to dry, reshaping it to maintain its dimensions. This helps enhance the stitch definition and overall appearance.
Storage: Store your crochet square in a cool, dry place away from direct sunlight to prevent fading and ensure its vibrancy lasts throughout the seasons.
Halloween Graveyard Crochet Square FAQs
Can I substitute the yarn, and if so, what should I use?
Absolutely! While the pattern suggests a medium worsted weight acrylic blend, you can definitely experiment with other yarns. For a slightly softer feel, consider acrylic cotton blends or even a worsted weight wool for added warmth. Just remember to check your gauge, as different fibers may alter the dimensions of your finished square.
How can I adjust the size of the crochet graveyard square?
To make your square larger, simply add additional rows to each side or increase your foundation chain length. Keep in mind that you’ll need to ensure your colorwork remains proportional. For smaller pieces, you can just decrease the number of stitches in your foundation chain and adjust the row count accordingly. Always double-check your stitch count!
Why is my work curling at the edges?
Don't panic! Curling is often a sign of uneven tension or too tight of stitches. I recommend checking your tension and trying to ease up a bit while working. Blocking your finished piece can also help flatten the edges, giving your crochet graveyard square a neater appearance once completed.
What hook size should I use for the best results?
For this pattern, a 5.0 mm (H-8) crochet hook is ideal for achieving the desired stitch density. If you find your stitches are too tight or too loose, feel free to try a different hook size—just remember to check your gauge to keep your square’s dimensions accurate.
How do I fix a dropped stitch in my crochet square?
It’s an easy fix! Simply use a yarn needle to weave the dropped stitch back into place. Pull the yarn through the last good stitch and secure it tightly to avoid future unraveling. If you notice other dropped stitches, just keep an eye out and secure them as you go!
Can I add extra motifs to my crochet graveyard square?
Absolutely! Adding extra motifs like bats or pumpkins will personalize your square even more and enhance the playful theme. Just plan where you want them to appear and integrate them during the body or edging phase of the pattern. Enjoy the creative process!
Leave a Reply