
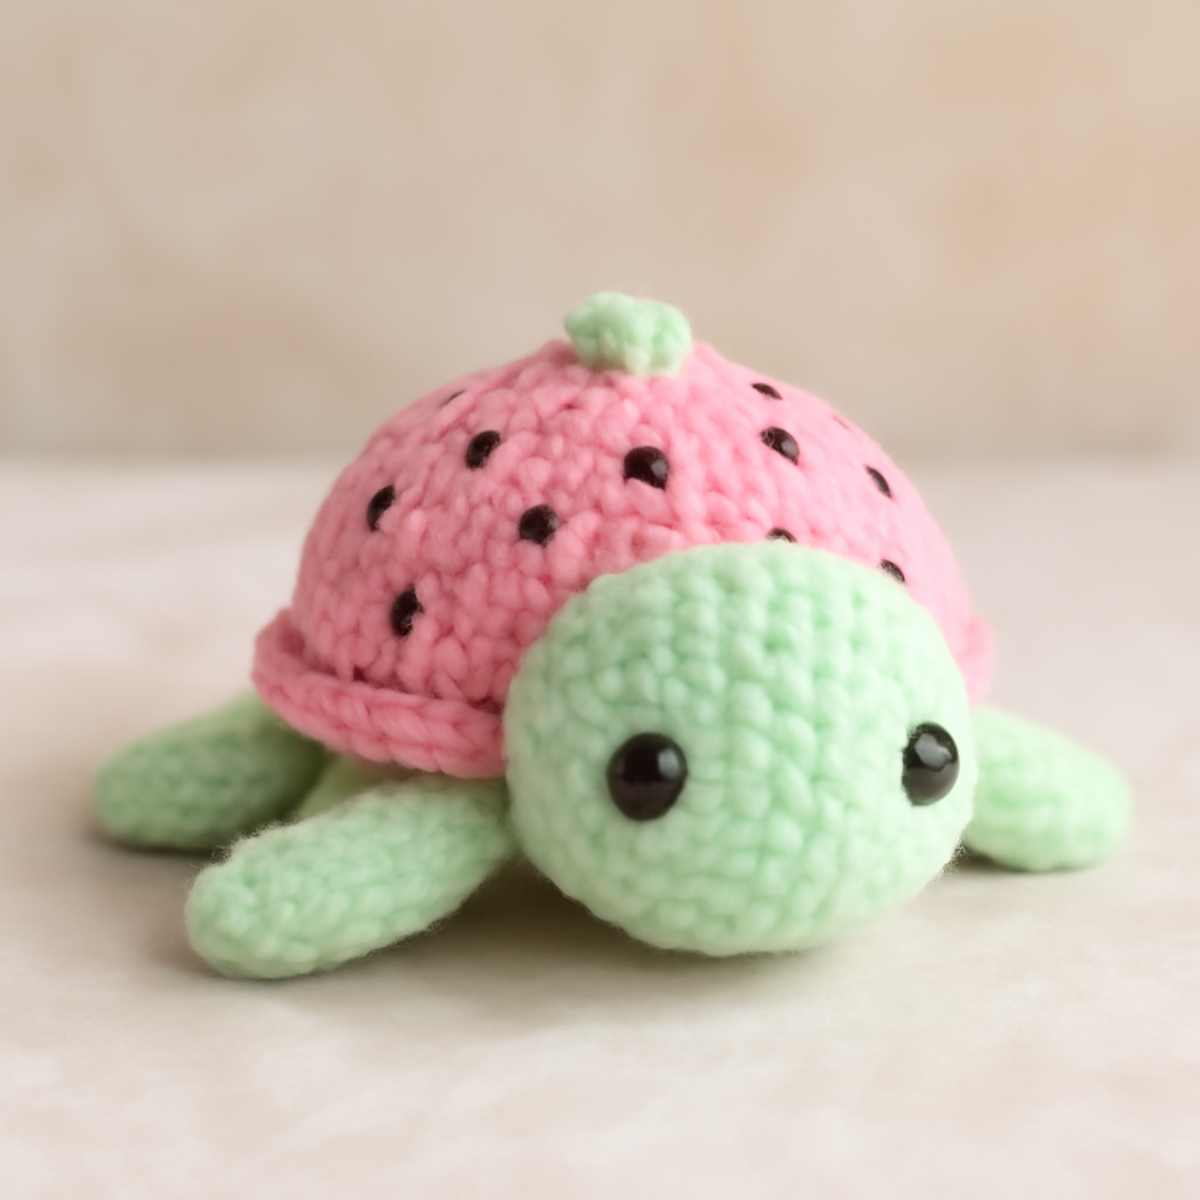
As I sat down with my favorite plush chenille yarn, the warmth of its soft texture inspired me to create something bright and joyful. Enter the cute fruit turtles—an absolutely delightful project that combines whimsy with creativity! This crochet pattern is perfect for both beginners and intermediate crafters, offering a fun and engaging way to bring cheer into your home. Vibrant colors and playful fruit designs make these turtles a feast for the eyes, and with a relatively quick finish time, they’re ideal for last-minute gifts or a charming decor piece. Plus, the use of simple rounds and basic stitches ensures that you'll enjoy each stitch as you watch your turtles come to life. Are you ready to add a splash of fun to your crafting journey? Let’s dive into making your own cute fruit turtles!
Cute Fruit Turtles Materials & Tools
- Plush Chenille Yarn – Choose a category 5 (bulky) yarn in vibrant colors like pastel pink for watermelon, peach for peach turtles, and mint green for the base; approximately 100-200 yards should cover all the turtles.
- 4.0 mm (G/6) Hook – A perfect size for working with the plush yarn and creating that soft, textured finish for your cute fruit turtles.
- Black Safety Eyes (8-10 mm) – Add a touch of personality to your turtles with these safety eyes, ensuring they have expressive and adorable faces.
- Polyester Stuffing – Use this to fill your turtles, giving them that plushy comfort and inviting look that makes them perfect for hugs.
- Yarn Needle – Handy for weaving in ends and assembling your cute fruit turtles beautifully.
Why Are Cute Fruit Turtles a Must-Make?
Whimsical Design: These cute fruit turtles are based on playful fruit themes, making them an eye-catching addition to any space.
Beginner-Friendly: Crafted using simple techniques, the pattern caters to both beginners and intermediate crafters, ensuring everyone can join in on the fun.
Quick Project: With a manageable finish time, you can whip up these delightful turtles for last-minute gifts or heartfelt decor.
Plushy Comfort: Made with soft chenille yarn, these turtles possess a cozy texture that invites cuddles and brightens any room.
Customizable Colors: Easily adapt the color palette to suit seasonal themes or personal preferences, allowing for unique creations each time.
Playful Decor: Whether displayed on a shelf or gifted to friends, these turtles add a touch of whimsy and charm, making them a perfect conversation starter!
Gauge & Sizing Notes
Don't skip the gauge swatch! Checking your tension is essential for crafting your cute fruit turtles, as it ensures a delightful, uniform look across your finished pieces. A standard gauge to aim for is 4 inches (10 cm) = about 10 single crochets and 12 rows. If you find your swatch is smaller, try going up a hook size to adjust your tension. To resize your turtles, for instance, to make them wider, simply increase your starting chain in multiples of 6. Remember, these adjustments help you achieve the playful proportions of your cute fruit turtles, ensuring they turn out just right!
Step-by-Step Pattern for cute fruit turtles
Round 1: Create the Magic Ring
Start with a magic ring and work 6 sc into it to form the base of your turtle's head. Pull the magic ring tight to close the circle. Your work should begin to take shape, forming a small, tight circle. (6 sts)
Round 2: Increase to Form the Head
Chain 1, then work 2 sc in each st around to increase the head size. This round will give your turtle that lovely rounded appearance. You should see your circle expand a bit more now. (12 sts)
Round 3: Continue Increasing
Chain 1, then sc in the next st, inc in the next st; repeat around. This will gently widen the head while maintaining its shape. You’ll see the head becoming more pronounced and round at this stage. (18 sts)
Round 4: Work the Sides
Chain 1, then sc in each st around. This helps to establish a solid base before moving on to the body, and your work should remain flat and even. (18 sts)
Round 5: Start the Body
Change color for the body (if desired). Chain 1, then sc in each st around. Your turtle should feel more substantial now as the body starts to take form. (18 sts)
Rounds 6-8: Build the Body Height
Continue with sc in each st around for three rounds. This will create height for your cute fruit turtles. At this stage, your work should be forming a rounded body shape. (18 sts each round)
Round 9: Begin Shaping the Shell
Change color again for the shell. Chain 1, then sc in the next 2 sts, inc in the next st; repeat around to start shaping the shell. You should see a gentle curve developing. (24 sts)
Rounds 10-12: Complete the Shell
Continue using the shell color, sc in each st around for three more rounds. This solidifies your turtle shell and further emphasizes the adorable design. It should feel robust in your hands now. (24 sts each round)
Step 1: Add Legs
With contrasting yarn, attach yarn at the bottom of the body, chain 1, then work 6 sc evenly spaced around the base to create the turtle's legs. Your cute fruit turtles should start looking more complete, ready to crawl! (6 sts)
Step 2: Connect the Head and Body
Using the original head color, sl st to attach the head to the body, ensuring a seamless transition. As you merge the two, the turtle will take on its final shape.
Step 3: Attach Eyes and Stuff
Insert the safety eyes into the head, placing them evenly apart. Stuff the body gently with polyester filling until it’s plush but not too firm. Your turtle should feel soft and cuddly at this point.
Step 4: Edging and Final Touches
Using a sl st, create a simple border around the edge of the shell. This gives your cute fruit turtles a neat finish and adds a charming detail for extra flair!
How to Wash and Care for Your Cute Fruit Turtles
Machine Washing: Use a gentle cycle with cold water to wash your cute fruit turtles, ensuring they maintain their shape and colors without too much agitation.
Hand Washing: For a more careful approach, gently hand wash your turtles in cold water with mild detergent. Avoid wringing them out to prevent distortion of their plush form.
Drying/Blocking: Lay your turtles flat to dry on a clean, dry towel. Reshape their bodies and shells while damp to help set their cute shapes, ensuring they look their best.
Storage: Keep your cute fruit turtles in a cool, dry place away from direct sunlight. Avoid stacking them to prevent squishing and maintain their adorable features.
Cute Fruit Turtles Variations & Substitutions
Dive into the joyful world of crochet customization, where your unique style can bring these turtles to life even more!
-
Yarn Weight Swaps: Use a lighter category 4 yarn for smaller turtles. Simply adjust your hook size accordingly for a finer finish.
-
Color-Blocking Shells: Introduce multi-colored shells by changing yarn every few rounds. Experiment with color gradients for a stunning visual effect.
-
Fiber Alternatives: Opt for cotton yarn instead of chenille for a more breathable texture, perfect for warmer climates or playful summer decor.
-
Pom-Pom Accents: Add playful pom-poms to the tops of each fruit turtle’s head for a whimsical touch. They’ll bring an extra layer of joy to your creations.
-
Larger Turtles: To make a bigger version, use a chunky yarn and increase your stitch count in increasing rounds. This creates an eye-catching statement piece in a playful size!
-
Embroidered Features: Enhance character by embroidering the eyes instead of using safety eyes. This adds a personal touch that makes each turtle feel unique.
-
Fringe or Tassel Details: Attach fringe or tassels around the base of the turtles for an exciting texture contrast. This elevates your design while keeping it playful.
-
Seasonal Color Themes: Change the colors based on holidays or seasons, like bright reds and greens for Christmas or pastel shades for Easter, ensuring your turtles remain relevant year-round.
Expert Tips for Crafting Cute Fruit Turtles
-
Watch Your Tension: Keep an eye on your stitch tension while working with plush yarn, as it can vary. Consistent tension helps maintain uniform shapes for your cute fruit turtles.
-
Count Stitches: Regularly count your stitches, especially in increasing rounds. This prevents any unexpected shape shifts that could disrupt the turtle's proportion.
-
Stuff Gently: When adding polyester stuffing, remember to do it gently. Overstuffing can distort the shape, while too little can make the turtles sag. Aim for a soft plush that's still cuddly.
-
Block for Shape: After completing your turtles, consider gentle blocking to set their shape. This enhances the soft texture and gives your project that polished look.
-
Final Touch Attention: Pay special attention when attaching eyes and finishing touches. Placement can change the character of your turtles, so take your time to make each one unique!
What to Make after Cute Fruit Turtles?
As you bask in the joy of your cute fruit turtles, let’s explore more delightful projects that will add to your whimsical collection!
- Fruit-Themed Keychains: Capture the essence of your turtles with little fruit-inspired keychains, perfect for sprucing up your bags.
- Matching Plush Fruits: Create adorable plush fruits like strawberries or bananas to complement your turtles, sharing the same vibrant colors for a cohesive look.
- Amigurumi Fruit Basket: Craft a charming basket to display your turtles and fruits, adding a fun touch to your home decor.
- Playful Mobile: Design a delightful mobile with your turtles and other fruit designs that dances gently, creating an enchanting atmosphere in any space.
- Miniature Turtles: Scale down your turtle pattern for tiny versions, perfect for gifting to little ones or as playful embellishments around your home.
Let your creativity flow and keep the whimsy alive!
Cute Fruit Turtles FAQs
Can I substitute acrylic yarn for the plush chenille?
Absolutely! While plush chenille yarn gives a unique softness, you can use acrylic yarn, especially if it’s a bulky weight. Just keep in mind that it may alter the final look and texture of your cute fruit turtles, making them less plush.
How do I make my turtles bigger or smaller?
To adjust the size of your cute fruit turtles, simply use a thicker yarn or a larger crochet hook to increase the dimensions. Conversely, using a lighter yarn and a smaller hook will yield smaller turtles. Remember to keep an eye on your stitch counts!
Why is my turtle’s work curling up?
Don’t panic! Curling often happens due to tight stitches or incorrect tension. I recommend checking your tension and perhaps using a larger hook to see if that resolves the issue. If the problem persists, gently block your completed turtles to help them lay flat.
What hook size should I use for this pattern?
For crafting your cute fruit turtles, a 4.0 mm (G/6) crochet hook is ideal. This size complements the plush chenille yarn perfectly, giving you that lovely, textured finish while maintaining the integrity of your stitches.
I accidentally dropped a stitch. How can I fix it?
It’s an easy fix! Simply grab your yarn needle to reinsert the dropped stitch back into place. If you’ve lost several stitches, don’t hesitate to unravel back to the last row with your complete stitches, and try again! Keep calm; every crafter has been there!
Leave a Reply