
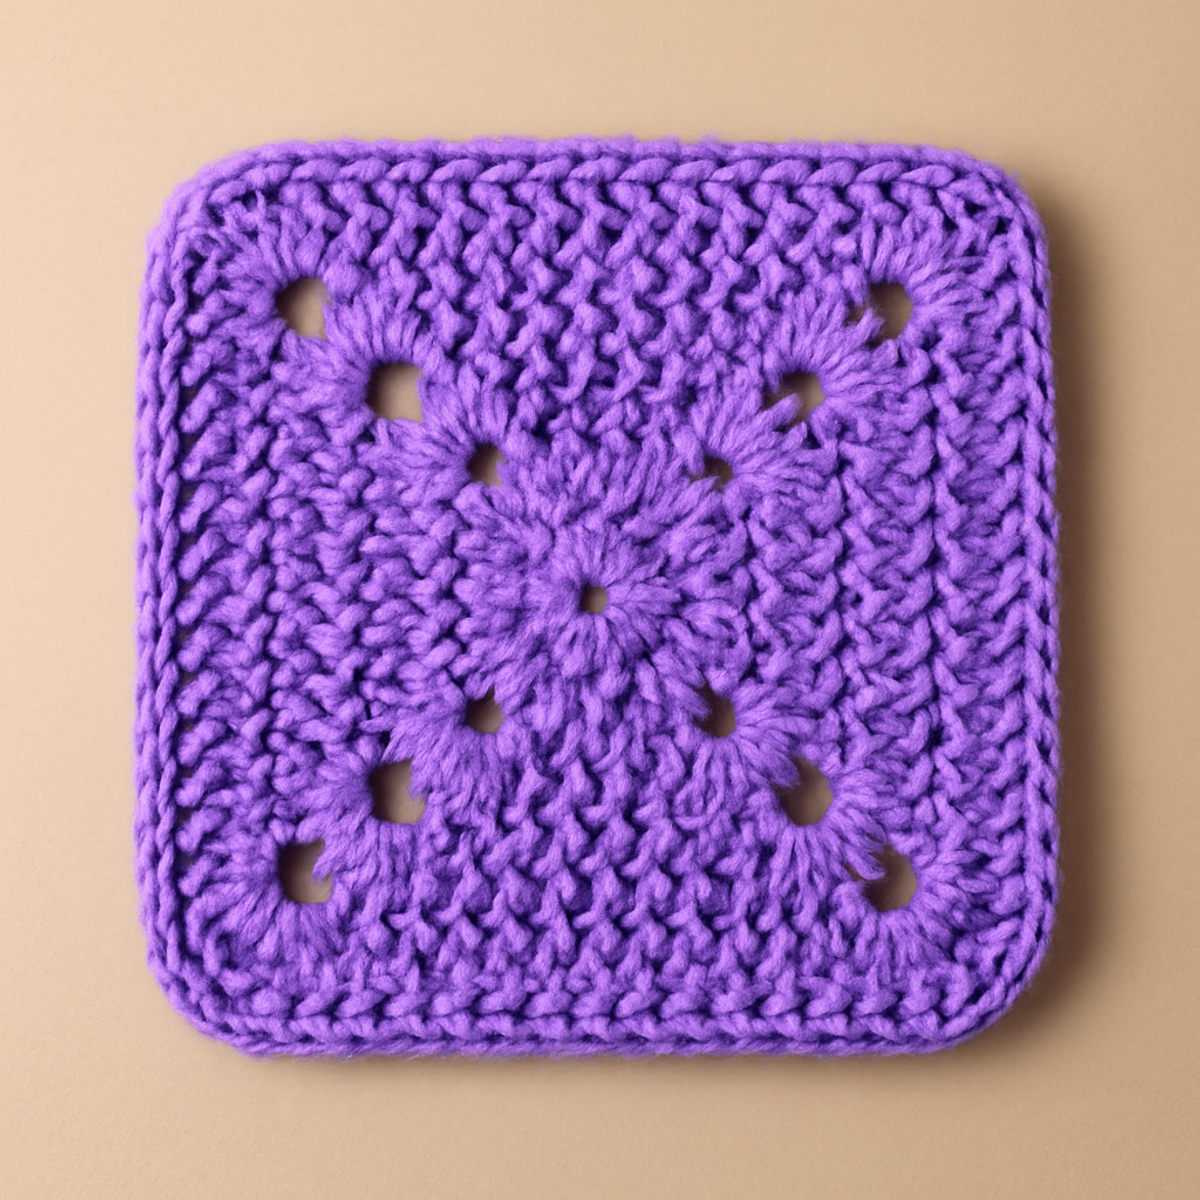
There’s something magical about the first time you pull a yarn skein and watch it twist into a radiant granny square crochet. This timeless pattern is not just a stitch; it's a gateway to endless creativity and skill-building, perfect for beginners eager to take their crochet journey to the next level. With its vibrant lavender hue and inviting textures, this Classic Granny Square Motif is as much about learning as it is about crafting a piece of art. Plus, it’s a fantastic way to personalize your space while stretching those creative muscles with an array of colors and designs. Whether you're planning to create cozy blankets, chic garments, or even decorative accents, this project promises to deliver a sense of accomplishment with every completed square. So, grab your yarn and hook, and let’s dive into the delightful world of granny squares together!
Granny Square Crochet Materials & Tools
- Medium Weight Yarn – Aim for approximately 100-150 yards of cotton or acrylic for comfort and durability.
- 5.0mm (H-8) Hook – This size is great for achieving the right texture and stitch definition for your granny squares.
- Yarn Needle – Essential for weaving in ends and finishing your squares neatly.
- Stitch Markers – Use these to keep track of corner stitches, which helps maintain the correct stitch count throughout your rounds.
Why Choose This Granny Square Crochet?
Timeless Appeal: The granny square crochet pattern is a classic choice that never goes out of style, allowing you to create pieces that are as stylish as they are functional.
Skill-Building: Ideal for beginners, this pattern helps sharpen essential crochet techniques while providing a gratifying sense of accomplishment with each square completed.
Creative Freedom: With endless possibilities for colors and designs, you can easily customize your squares to reflect your personal style, making each project uniquely yours.
Versatile Uses: Whether crafting cozy blankets or fashionable garments, this granny square serves as a building block for a multitude of projects, adapting beautifully to any creative vision.
Comfort & Durability: Using medium-weight yarn ensures a soft yet sturdy feel in your finished squares, perfect for both decorative touches and practical items.
How to Check Your Gauge for Granny Square Crochet
Don't skip the gauge swatch! Checking your tension is vital for achieving the desired size of your granny square crochet. A typical guideline to aim for is a 4×4 inch (10×10 cm) square should yield about 12 double crochets by 8 rows. If you find your tension doesn't match, it’s okay! To scale your granny square larger, simply increase your initial chain in multiples of 3. If your swatch is coming out too small, consider going up a hook size. Remember, every tiny adjustment can lead you to the perfect, cozy result that you're crafting!
Step-by-Step Pattern for Classic Granny Square Motif
Row 1: Start Your Square
Begin by creating a magic ring (or ch 4 and join). Perform 3 ch (counts as your first dc) and then make 2 dc (double crochet) into the ring. Follow this with (2 ch) to form a corner space, then repeat (3 dc and 2 ch) two more times. Join with a slip stitch to the top of the starting ch (12 sts total, your work should resemble a small circle).
Round 2: Expanding Your Square
Slip stitch into the next ch-2 space, then ch 3 (counts as first dc). Work 2 dc into the same space, then ch 2 to form your new corner. In each of the next 3 ch-2 spaces, make (3 dc, ch 2) to form three corners. After completing the last corner, join in the same way with a slip stitch to the starting ch (24 sts total, your work should start to take shape into a square).
Round 3: Continue to Build
Slip stitch into the next ch-2 space, then ch 3. Work 2 dc in the same space followed by a ch 2 for the corner. In the next space between the corners (between your last corner and the next), place 3 dc to create a side. Repeat (3 dc, ch 2, 3 dc) at each corner and (3 dc) between corners, joining with a slip stitch at the start (36 sts total, your square should widen as you progress).
Round 4: Creating More Texture
Slip stitch into the ch-2 space, then ch 3, followed by 2 dc in the same space and a ch 2. Again, make 3 dc in each side space (the spaces between corners). In each corner, work (3 dc, ch 2, 3 dc) while maintaining your stitch count by paying attention to the spaces. Join with a slip stitch to your beginning ch (48 sts total; your square now should appear more pronounced).
Final Round: Neatening Edges
For the final round, make a slip stitch into the next ch-2 space and ch 3. Work 2 dc in the same corner. In each side space, work 2 dc for a sleek finish. At each corner, continue with (3 dc, ch 2, 3 dc). When you’ve reached the end, join with a slip stitch to the top of the starting ch (60 sts total; your square is now complete and should feel uniformly thicker).
Granny Square Crochet Variations
Unlock the full potential of your crochet journey by exploring these delightful customization ideas!
-
Ombre Effect: Use ombre yarn to create a stunning gradient across multiple squares, adding depth to your final piece. The gradual color transition invites warmth and intrigue, making every square a unique treasure.
-
Bulky Yarn: Swap your yarn for a bulky option to achieve a plush, cozy texture that works up quickly, perfect for chilly evenings. This change will not only speed up your project but also give your squares a delightful dimension.
-
Contrasting Borders: Add a vibrant contrasting border around your squares for a fun pop of color. This small touch can dramatically elevate the overall look, making your finished project feel more complete and professional.
-
Different Center Stitches: Experiment with alternative stitch patterns in the center, like half-double crochet or popcorn stitches, to introduce interesting textures. These variations can transform a familiar square into something refreshingly new and exciting.
-
Color Blocking: Create squares in distinct color blocks for a bold statement piece. Pair unexpected colors together to give a heartfelt nod to your personal style, turning your project into a lively celebration of creativity.
-
Sizing Adjustments: Don’t hesitate to adjust the hook size and yarn weight to create larger or smaller squares. This customization can enable you to craft unique items like coasters or larger home decor pieces.
-
Textured Accents: Add elements like pom-poms, fringe, or decorative edges for visual interest. These playful additions allow you to infuse your personality into each creation, celebrating your crochet skills while bringing extra flair to your squares.
-
Layering Squares: Combine multiple squares into a larger design by layering them for a quilt-like appearance. This technique not only showcases your color choices, but also invites playful textures to mingle in delightful harmony.
Expert Tips for Granny Square Crochet
-
Check Your Tension: Always ensure your tension is consistent; tighter stitches result in smaller squares and disrupt the overall project look.
-
Use Stitch Markers: Place stitch markers to track corner stitches, helping you maintain the correct stitch count and avoid losing your place in the rounds.
-
Count Regularly: Take a moment to count your stitches at the end of each round. It's easy to stray from the count, especially as you get caught up in the joy of creating.
-
Block Your Squares: After finishing, block your granny squares, especially with cotton yarn. This helps shape them into perfect squares for a polished finish.
-
Weave in Ends Neatly: Always use a yarn needle to weave in loose ends securely; this not only enhances the appearance but also strengthens your work.
What to Pair with Classic Granny Square Motif
As you bask in the joy of creating your granny squares, consider pairing them with delightful projects to enhance your crafting journey.
-
Charming Granny Blanket: Perfectly complement your squares, turning multiple motifs into a cozy throw that brightens your living space.
A blanket of varying squares brings warmth and nostalgia, inviting loved ones to curl up under it. -
Vibrant Pillow Covers: Use leftover squares or create new ones to fashion unique pillow covers that showcase your vibrant color choices.
These charming accents can transform any room effortlessly, making it feel more inviting and personal. -
Stylish Market Bag: Combine a few granny squares into a functional bag, great for farmers’ markets or grocery trips, keeping it effortlessly stylish.
This project promises a perfect marriage of utility and flair, embodying the spirit of creativity in your everyday life. -
Matching Coasters: Whip up mini granny squares for coasters, a delightful way to repurpose yarn scraps while adding charm to your coffee table.
These handmade coasters introduce a cozy touch to your surroundings, serving as conversation starters when guests visit. -
Cozy Beanie: Transform your granny squares into a delightful beanie, adding a warm accessory that’s as functional as it is fashionable.
Imagine the pride of sporting a hand-crocheted piece that highlights your unique style while keeping you snug on chilly days.
Care Instructions for Granny Square Crochet
Machine Washing: Use cold water on a gentle cycle to avoid agitation, which can lead to felting or pilling in your finished granny square crochet.
Hand Washing: For extra care, hand wash in cold water with a mild detergent, gently swishing your square without twisting to preserve its shape and texture.
Drying/Blocking: Lay your granny square flat to dry, reshaping it if necessary. Blocking helps to define the edges and ensure your square retains its lovely shape.
Storage: Store your completed squares in a cool, dry place, away from direct sunlight. This helps prevent fading and keeps them looking fresh and vibrant for your projects.
Classic Granny Square Crochet FAQs
Can I use a different type of yarn for this granny square crochet?
Absolutely! While the pattern suggests medium-weight cotton or acrylic yarn, you can use other fibers too. Just be sure to check the weight category to maintain the right drape and texture. Keep in mind that switching yarn fibers may impact the overall look and feel of your squares.
How can I make my granny square larger or smaller?
To adjust sizing, you can change your hook size. Using a larger hook will give you a looser tension and create a bigger square, whereas a smaller hook will yield tighter stitches and a smaller square. Experimenting with your tension can also help you achieve your desired size.
Why is my granny square curling at the edges?
Don't panic! Curling is often caused by tight tension. Check to ensure your stitches aren’t too tight; try loosening up a bit. If you've followed the pattern correctly but still experience curling, blocking your finished square will help flatten it out and give it a nice shape.
What hook size should I use for this pattern?
For the Classic Granny Square, a 5mm (H-8) crochet hook is ideal, as it caters well to the medium-weight yarn. If you find your stitches are too tight, you might want to switch to a larger hook to achieve that perfect drape and texture!
How do I fix a dropped stitch in my granny square?
It’s an easy fix! Simply locate the dropped stitch and pick it up using your hook. You can use a yarn needle to weave the yarn back through the correct loops. If you're unsure, consult a beginner's guide on fixing dropped stitches for a visual tutorial.
What if my stitches aren’t lining up perfectly?
No worries! It’s common for beginners to experience uneven stitches. To help keep track, use stitch markers to note the corner stitches, and consistently count your stitches at the end of each round. Practice will definitely improve your consistency over time!
Leave a Reply